Tag Archives: Efficiency

Nest Thermostat Improvements!

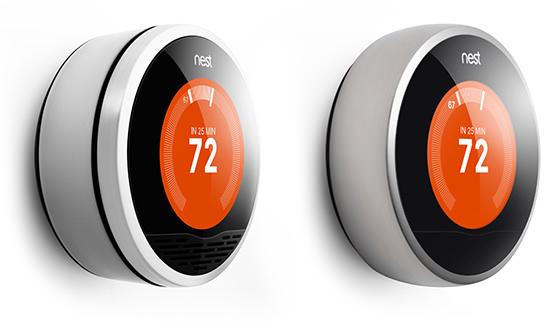
Today Nest announced it’s newest version of their programmable thermostat.

I had the incredible luck of buying a Nest “1.0” on the day it was released (10/25/11), *by accident*. My previous thermostat had died the day before and after adding it to our e-recycle box (thermostats have mercury and other materials that need to be correctly handled i.e. not chucked on the top of a landfill where it will slowly seep into the surroundings) I googled for thermostats and the Nest showed up – I read about the features and after some frustrated attempts at their website (“Why does the checkout page keep crashing!?”) I placed an order. Only later did I realize it had been unveiled just hours earlier and all the web was a-twitter about the new product of Tony Fadell, a former Apple designer I admire for taking on a job to more directly work on things that are good for our ecosystem.

Nest Thermostats are a form of smart control that are make it easy and automatic to keep your house comfortable using less. Nest improves efficiency by taking into account furnace types and heat inertia to better time when gas has to get burned; and reduces waste by allowing you to control it remotely and sense when everyone is away.

Nest_old_vs_new

The little data I have suggests the Nest has reduced the heating natural gas used in my household by about 20% – once I correct for water heating, the only other use of natural gas use at our place, and a series of efficiency upgrades we did shortly after.

Analyzing it from a perspective of “Dollar to % savings”, it has been about 10x as efficient as changing our insulation (a $6000 job that improved our heating efficiency drastically) or the prospect of upgrading our furnace (depending on installation costs, it could be $5000 to replace a 80% efficient furnace with a %97 efficient furnace, without considering a heat pump system for simplicity of the comparison).

  • Nest: $250, for ~20% improvement,
  • Upgrading furnace: $5000 for ~17% improvement,
  • Replacing insulation in attic & crawlspace: $6000 for ~ potential $20%.

The previous thermostat was not optimally programmed to week by week changes, it was a hassle to program anyways, did not modify its own programming based on your real day-to-day behaviors, did not sense when we were out of the house, and did not allow us to control it anywhere via our phones (think of the convenience to turn the heat on from your car as you approach home at the end of a day outside), did not provide nice monthly reports to give you a sense of what’s going on, etc. etc.

I am also glad I got rid of the Honeywell device due to their corporate practices selling weapons worldwide and their ridiculous suing of Nest for patent infringement in -get this- “round thermostat” design and asking you setup questions. Nest is trying to get the USPTO to see the ridiculousness of those patents.

Honeywell sues Nest over ridiculous patents

Further improvements that affect heating efficiency we do or have done include:

  • Replacing some windows for double-paned models (very low savings-per-dollar compared to simply installing cellular curtains)
  • Closing off crawlspace ventilation in the coldest months, reducing air leaks
  • Using electric space heaters in spaces where insta-heat is better than heating a whole house (e.g. when changing babies at 4AM)

I don’t want this post so sound like an ad, but the Nest did save a lot of burnt natural gas for everyone, and saved money for us. Plus, it looks stunningly gorgeous on our wall, and I especially like how the screen fades on and off as I walk by.


Measuring power use on 240V appliances

In the USA large appliances like clothes dryers or electric car chargers are built for 240V. I happily have used the Kill-A-Watt EZ for simple measurements, but 240V appliances can’t be measured through it. The TED5000 I have measure whole-house electricity usage, but I wanted to update my chart of where power goes in my house (electric power, that is). I want to get an updated picture of what % goes to heating, fridges, etc.

The TED5000 could be a great option but having to install a new MTU and CTs seemed complex, especially once it comes to aggregating the data into only one gateway. I thought splitting the 240V lines and feeding one live/neutral pair in a Kill-A-Watt… but not knowing more about the internals of the Kill-A-Watt I felt I may introduce unnecessary safety risks.

Instead, I built my own portable 240 Volt power meter:

Parts

  • Get a Dryer cable (there are differrent models, older 3-prong and newer 4-prong plugs with separate ground and neutral connections. I got the type of cable I needed). Example
  • Get a surface-mount receptacle for the same type of cable you have. Example
  • Get a EKM DIN-Mount power meter

With these elements in hands I assembled a simple 240V “extension cord” that has a remote display to measure the power going through it. The remoteness of the display (a design idea from the Belkin Conserve meter that is otherwise useless) is useful especially with 240V appliances where the outlets are inaccessible, behind heavy stuff, plugs are huge and hard to maneuver in cramped conditions, and you generally don’t want to be messing around with them.

 The assembly was simple. I got lucky since the CT of the EKM device fit nicely in the surface mount box with no stress to case or cable.

Since it measures current going only through one live lead, the actual power is twice the displayed value in the meter. Unlike many other countries where the use of 2 out of 3 phases at 120deg phase is common, in the USA higher-voltage appliances are powered with two counter-phase live lines of 120V each, so getting the real power used is a simple matter of multiplying by 2 instead of by square root of 3.

This meter is handling 240V with high currents so it is important to do a careful job if you decide to build your own. Doing 240 V in Canada is illegal if you are not an electrician and you can void your house insurance. You can hurt your loved ones, yourself, or your property if you don’t know what you are doing (this is true for everything in life, however).

The EKM meter gets the current reading from the ring ammeter in the outlet, and reads the voltage through a couple of extra cables.

Here is the end layout before getting the EKM meter and cable into casing and protective stuff:

DIY 240 V power meter

The meter reads cumulative kWh so you need to keep a logbook of when you started and stopped measuring what. It tracks kWh to 2 decimal places so it’s more than precise enough for the use we are giving it.

Portable vs Breaker Panel metering?

I like the meter I built, for its portability, simplicity, and that I can lend it to friends.

But after getting some basic measurements I am considering installing the EKM as an add-on to my breaker panel. This will allow me to periodically re-wire the CT onto different circuits. I may decide to invest in a better meter – EKM has a very compelling product line– , but I have pushed my electricity consumption so low already that I would need to expect to discover significant in the data obtained in order to recover the cost. After all, the basics save most of the money.

But if you are starting the process I went through improving your house’s electricity efficiency from the beginning, or you want to discriminate between appliances such as electric cars, and you care about measuring stuff, I would highly recommend installing one of EKM’s smarter meters near the breaker box and investing in a couple of clamp-on CTs. If you don’t care about fine-grained measurement just follow the main improvements and use your bill to track improvement.

Feel free to leave comments & questions below!