
Download Sportzfy TV

| App Name | Sportzfy TV |
| Version | 9.1.70.1902 |
| Size | 114.5MB |
| Download | 1B+ |
| Last Update | 2026-07-29 |
sportzfy APK Download for Android in India
Introduction
sportzfy is a popular Android app designed for Indian sports fans who crave real-time updates, fantasy leagues, and reliable downloads. This page guides you through a safe sportzfy APK download, the latest version, and a smooth installation process tailored for India’s diverse devices and networks. Whether you follow cricket, football, kabaddi, or other sports, sportzfy keeps you connected with live scores, player statistics, and insightful analytics while prioritizing privacy and security for Android users across the country.
Feature Box
- Real-time match updates and alerts across multiple sports
- Comprehensive fantasy leagues with drafts and in-app contests
- Intuitive user interface optimized for budget Android devices
- Lightweight APK download with minimal data usage
- Secure installation process with checksum validation
- Offline access to key statistics and highlights
- Customizable alerts and news feeds

Table of Contents
- Hero
- Latest APKs
- Featured APKs
- Editor's Choice
- Latest Updates
- FAQ
What is sportzfy
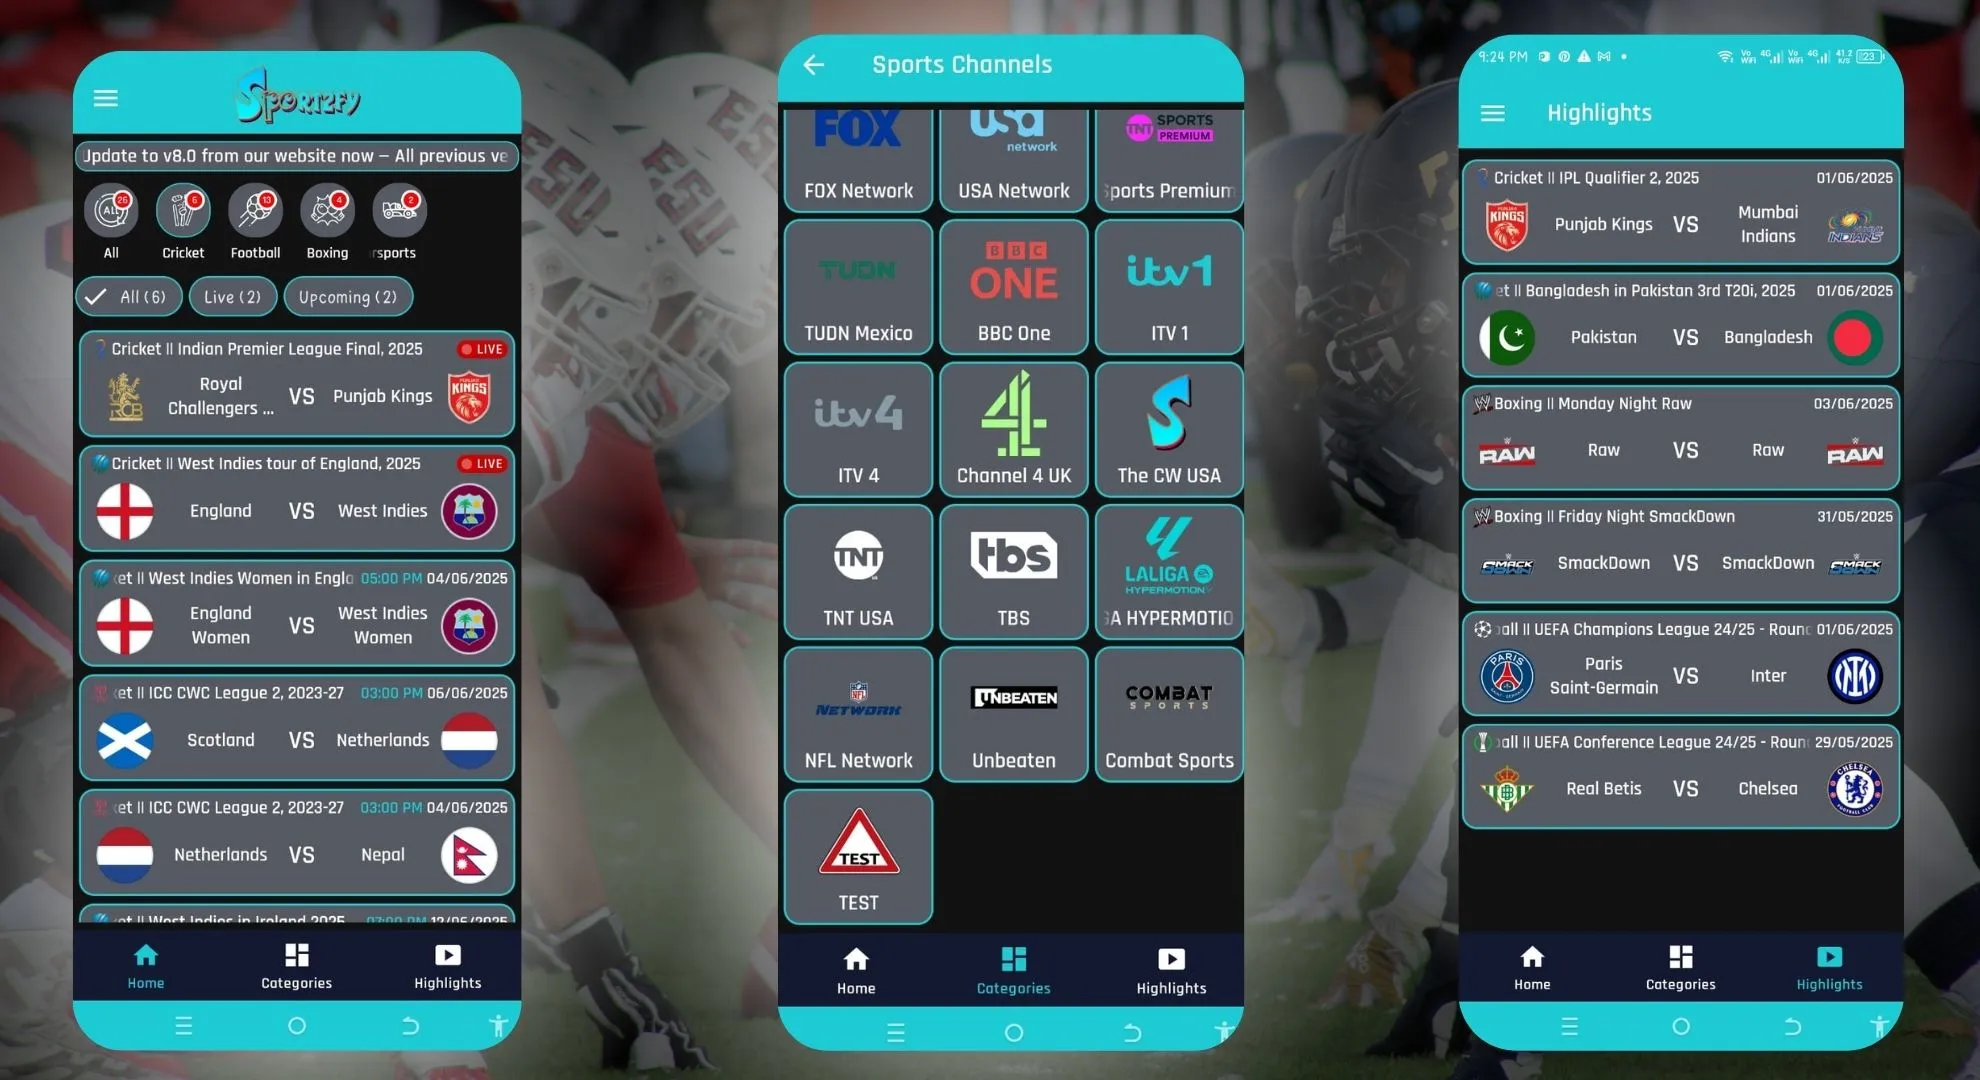
sportzfy is a dynamic Android application that merges live sports data with engaging fantasy sports features. It is engineered to serve Indian audiences who value timely information and a seamless download experience. The app aggregates live score feeds, match timelines, and player statistics from multiple leagues, presenting them in an accessible format. Users can join fantasy leagues, manage teams, and participate in contests designed for beginners and seasoned players alike. The sportzfy ecosystem also emphasizes safe downloads and regular updates to ensure compatibility with the latest Android versions and devices in India. Its focus on performance makes it suitable for phones with modest RAM and limited storage, ensuring a responsive experience even on slower networks. Whether you are at home or on the go, sportzfy keeps you informed with minimal friction.
- Real-time data streams from cricket, football, basketball, and other popular leagues.
- Intuitive dashboard showcasing scores, schedules, and player form.
- In-depth analytics and trends to help you make informed decisions in fantasy leagues.
- Secure, straightforward APK download process tailored for Indian users.
- Clear privacy controls and permissions explained for trust and safety.
Key Features
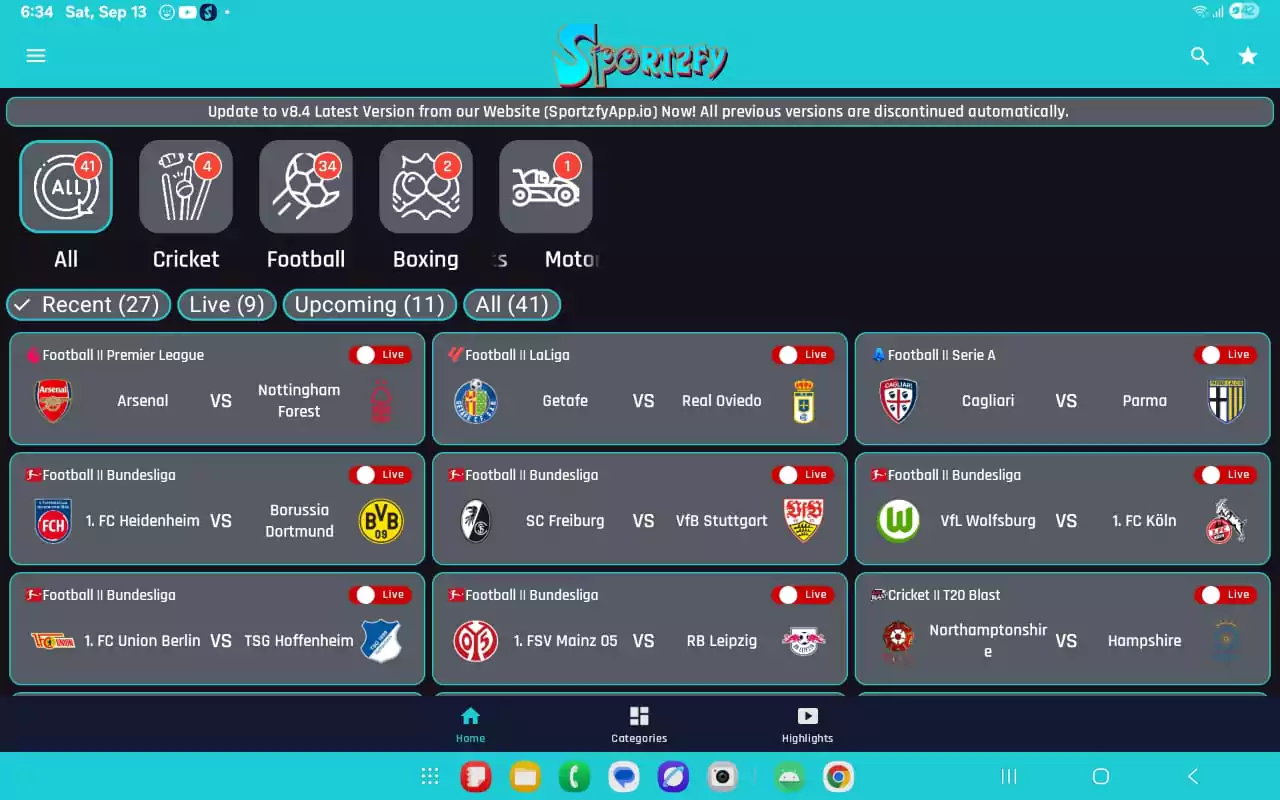
Real-time Scores and Alerts
Stay updated with live scores, ball-by-ball commentary, and push alerts for your favorite teams. The feature is optimized for India’s networks, delivering fast updates without excessive data usage, so you never miss a moment of the action.
Fantasy Leagues and Drafts
Build your squad, participate in drafts, and compete in leagues with friends or a global audience. The sportzfy Android app provides intuitive team management tools, player selection, and in-depth performance projections to boost your chances in contests.
Analytics and Insights
Access detailed player statistics, team form, and matchup analyses that help you strategize in fantasy play or casual fandom. The analytics are designed to be beginner-friendly yet powerful enough for serious stats enthusiasts across India.
Safe APK Download & Install
The download path is clearly laid out with safety checks to prevent tampering. The app provides checksum validation and clear installation steps, ensuring a trustworthy experience for Indian users installing sportzfy on Android devices.
Lightweight & Fast
Designed to work smoothly on budget devices with limited RAM and storage. The APK is optimized to load quickly, minimize background resource usage, and keep memory footprints low during intense match moments.
Offline Access
Key statistics, match summaries, and team sheets are available offline, so you can stay informed even when internet connectivity is spotty. This feature is especially valuable for users traveling or in regions with fluctuating networks.
Pros and Cons
| Pros | Cons |
|---|---|
| Real-time updates and comprehensive sports coverage | Free version may include occasional ads |
| Easy navigation and dedicated Indian audience focus | Requires internet for live data |
| Lightweight APK suitable for budget devices | APK distribution outside Play Store may vary by region |
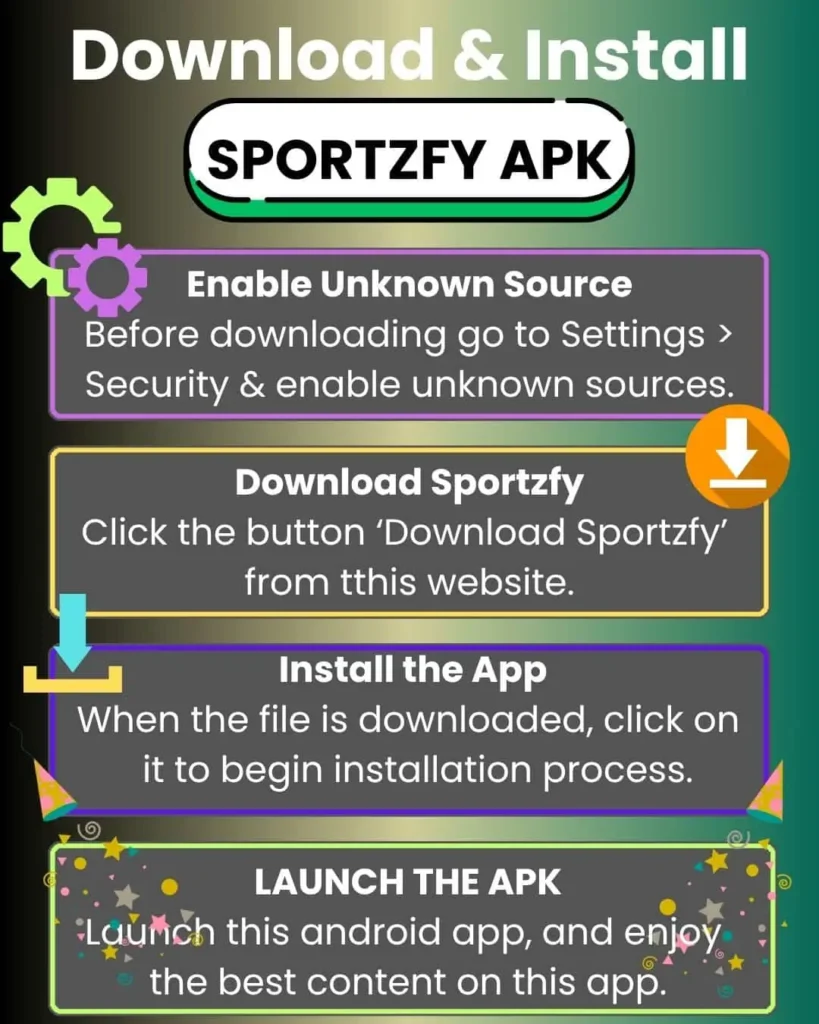
How to Download & Install
- Download APK file
- Enable Unknown Sources
- Install APK
- Open app and enjoy
To ensure a smooth experience, consider checking the APK integrity after download and choosing a stable network. On some Indian devices, you might be prompted to grant storage and notification permissions; these are standard and help deliver timely updates. After installation, launch sportzfy from your app drawer and sign in if you have an account, or explore guest access to preview features. If you encounter any issues, restarting the device or clearing cache can resolve many common problems. For a safer process, use the download link from trusted sources and verify the file size matches the expected value listed on the page. For ongoing updates, periodically check for the sportzfy latest version to access new features and improvements.
Download link example: Download sportzfy APK, which points to the official file hosted on our secure distribution server. Always prefer a direct APK from trusted domains to reduce the risk of tampering. The safe installation workflow ensures you can install without compromising device security or data privacy. Remember to disable Unknown Sources after installation to maintain system protection on shared devices.
Alternatives
- Dream11 — A leading fantasy sports platform for cricket and other popular leagues, ideal for bold players who enjoy creating and managing fantasy teams.
Suitable for: cricket fans who want social leagues and real-money contests. - MPL Sports — A broad mobile gaming and fantasy product with quick entry into diverse sports, perfect for casual gamers.
Suitable for: casual players seeking quick-start fantasy experiences. - Howzat — A fast-growing fantasy sports platform focused on intuitive design and local leagues, great for beginners.
Suitable for: new players exploring fantasy sports in India.
FAQ
Is sportzfy free to download?
Yes, the base app is free to download and use. Some features or contests may offer optional in-app purchases or premium access. You can enjoy core live scores, updates, and basic analytics without paying.
Is sportzfy safe to install on Android?
Sportzfy prioritizes user safety with a straightforward APK download path, checksum validation, and clear permissions. Always download from trusted sources and keep your device security updates current to minimize risk.
Does sportzfy support offline mode?
Yes, key statistics and highlights may be available offline after initial synchronization. This helps users stay informed when connectivity is limited, making it suitable for travel and areas with weak networks.
Can I update via APK or only through the Play Store?
You can upgrade using the APK from the same trusted download source or via official stores if available. Periodic updates bring new features, bug fixes, and security improvements, so staying current is recommended.
Is sportzfy available on Google Play Store?
Availability may vary by region. In India, the APK download path provides access to the latest version when the Play Store listing is restricted or requires regional conditions.
How do I uninstall sportzfy?
Go to your device settings, locate sportzfy in the apps list, and select uninstall. If you encounter residual data, you can clear cache and app data from the same settings menu before deletion.
Conclusion
In summary, sportzfy delivers a holistic Android experience for Indian sports enthusiasts. With real-time updates, engaging fantasy modes, robust analytics, and a safe, streamlined APK download process, it stands out as a practical choice for Android users across India. The app’s lightweight footprint, offline options, and clear installation steps make it accessible on devices with varying specifications. If you are searching for an Indian-friendly solution to monitor live games, manage fantasy squads, and stay informed without unnecessary complexity, sportzfy is worth trying. sportzfy not only keeps you connected to the action but also respects your privacy and security while offering a compelling user journey from download to daily use.